Chapter11 :추적에 따른 불빛 보이기
1.Preparation
1.You should learn about the position of the RGB tracking obstacle avoidance 3 in 1 module in the body of hellobot;
2.You should learn about the principle of the tracking.
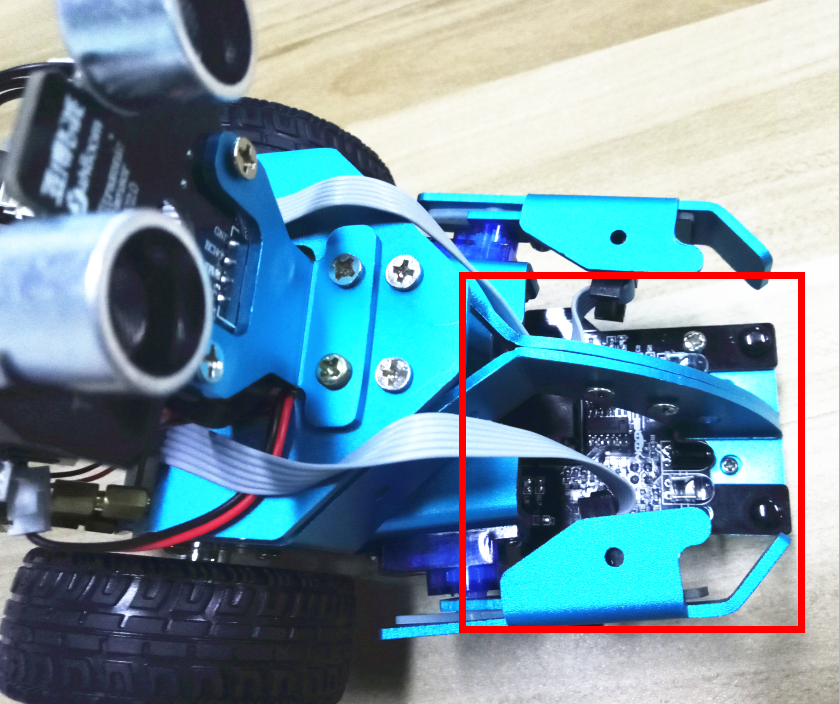
7-1-1 RGB tracking obstacle avoidance 3 in 1 module
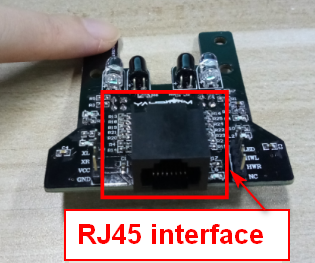
7-1-2 RJ45 interface of RGB tracking obstacle avoidance 3 in 1 module
- Back of module (c) Front of module
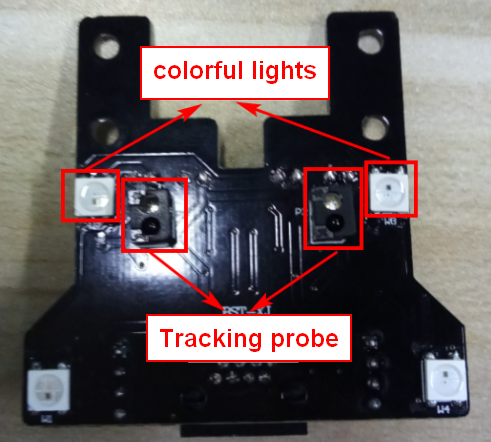
7-1-3 RGB tracking obstacle avoidance 3 in 1 module

7-1-4 RJ45 interface and cable
The RGB tracking obstacle avoidance 3 in 1 module is installed under the robot arm of the HelloBot, and we need to use the network cable to connect the RGB tracking obstacle avoidance 3 in 1 module.
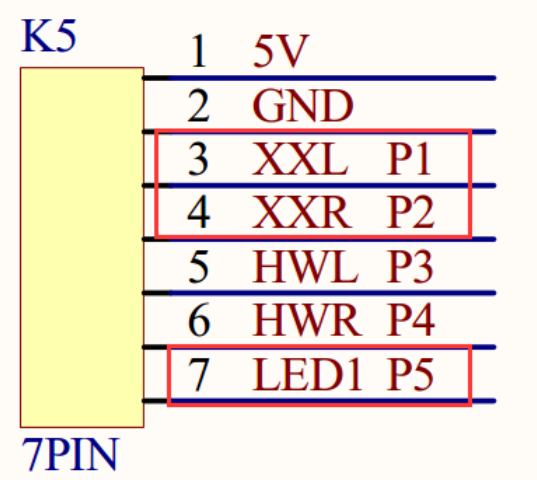
7-1-5 schematic

7-1-6 Pins of Micro:bit
From the schematic diagram. You can see that left probe is connected to P1 of Micro:bit, right probe is connected to P1 of Micro:bit, colorful lights is connected to P5 of Micro:bit.
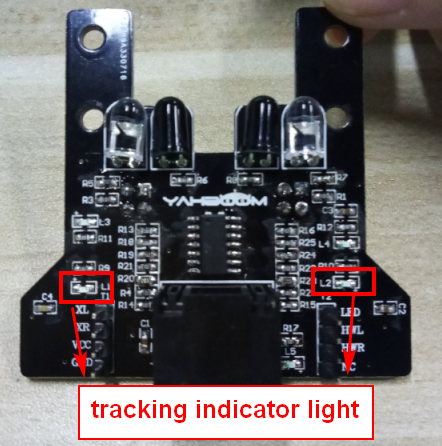
Principle of tracking: The basic principle of the infrared tracking sensor is to take advantage of the reflective nature of the object. When the infrared light is emitted onto the black line, it will be absorbed by the black line, but when the infrared light is emitted onto the other colors line, it will be reflected onto the infrared receiver pin. When the car's tracking module detect the black line, the indicator light is light up, and when the white object was detected, the indicator light is light out.
According to this, we write the corresponding code to make the car complete tracking function.
Note:The tracking sensor is not working properly due to the interference of outdoor light. This course needs to be carried out indoors and the curtains are covered to block the outdoor light.
- Learning goals
In this course, we will learn how to make tracking module detect the black line, the colorful lights are green, and when the white object was detected, the colorful lights are red.
3.Programming
3.1 Programming online
1) You should use the USB cable to connect the micro:bit to the computer, at this point, the computer will have a micro:bit U disk. You need to open it, click micro:bit website, then entered the micro:bit website or you can enter the URL directly in your browser: http://microbit.org/
2) After entering the programming interface, you need to click Add package and copy the HelloBot package URL: https://github.com/lzty634158/HelloBot to the input field, click to confirm the add package. Then you can use the blocks of the HelloBot package.
3.2 Programming offline
- You can double-click to use it. As shown in the following figure.
2) After entering the programming interface, you need to click Add package and copy the HelloBot package URL: https://github.com/lzty634158/HelloBot to the input field, click to confirm the add package. Then you can use the blocks of the HelloBot package.
Note: The package only needs to be added once. If you have added packages in the previous lessons, this course does not need to be added repeatedly.
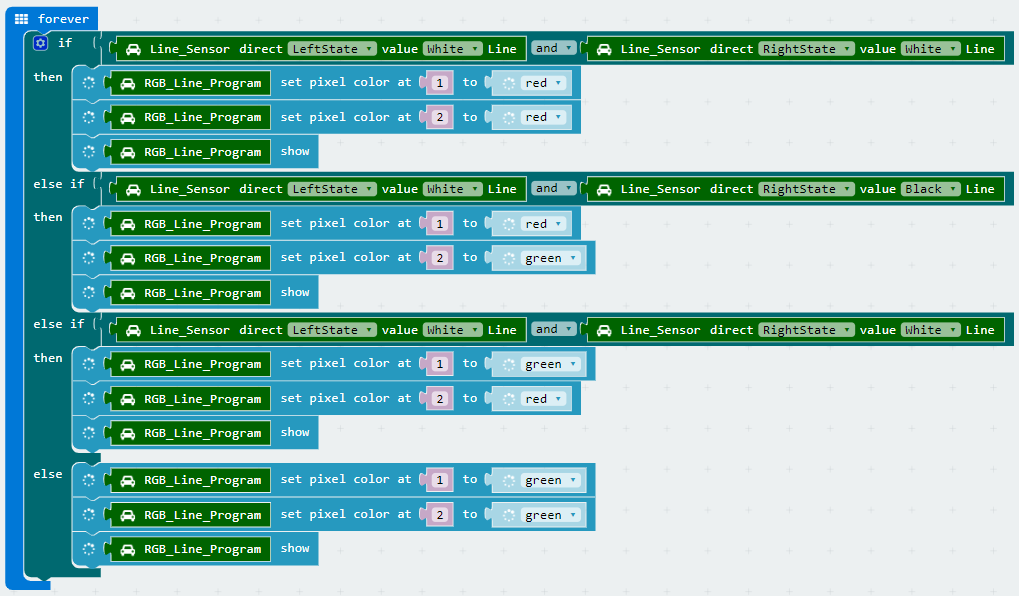
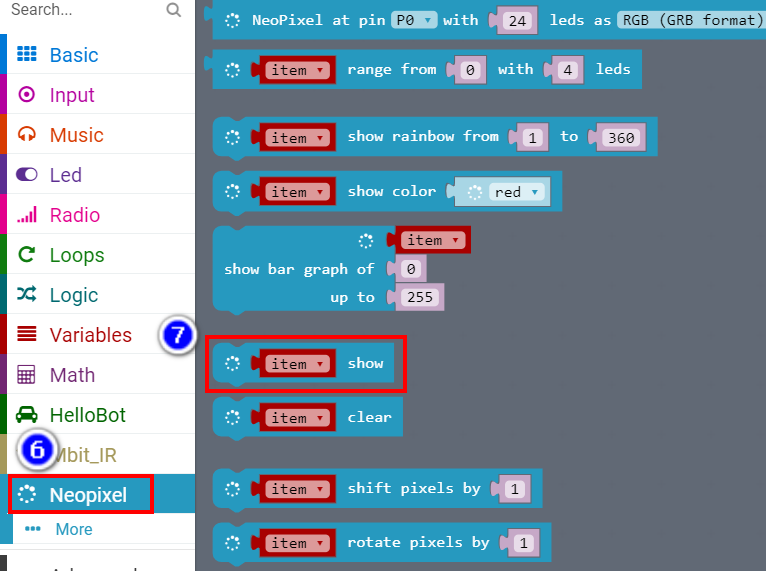
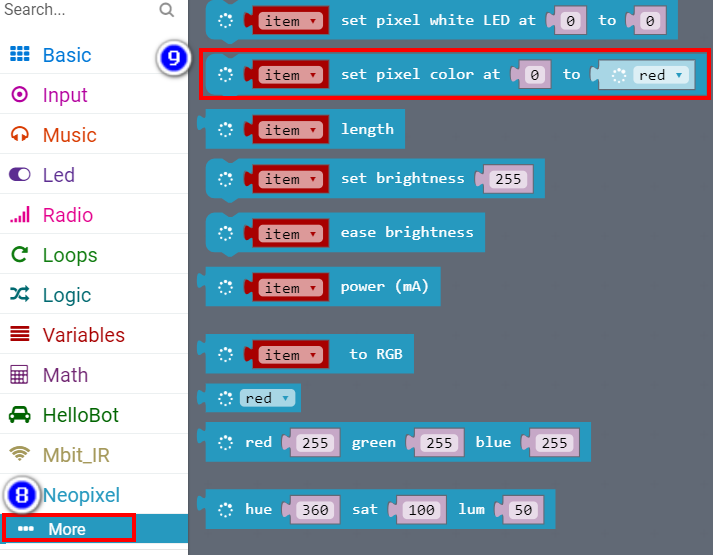
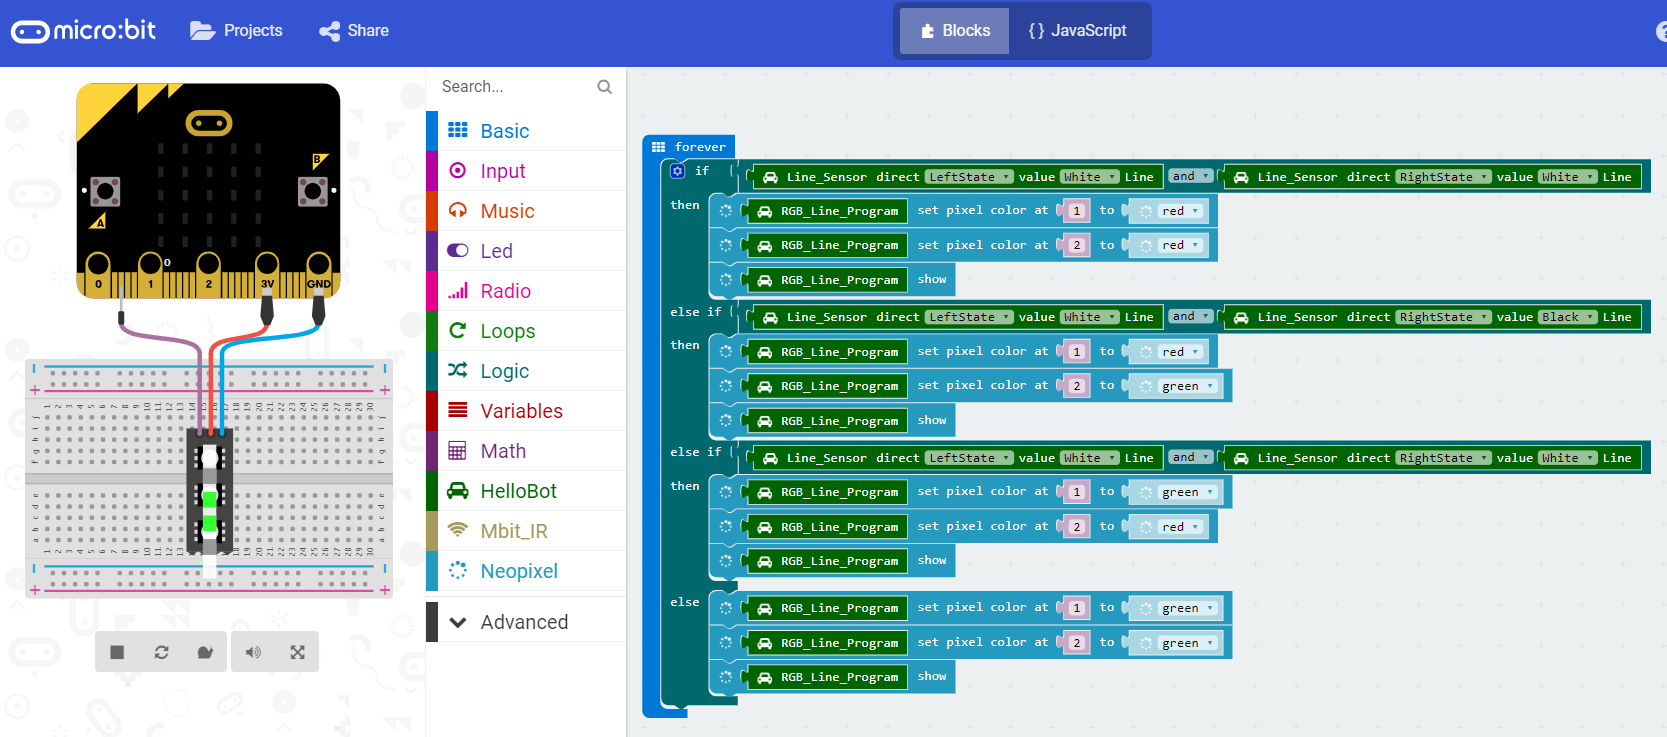
7-1-7 total program
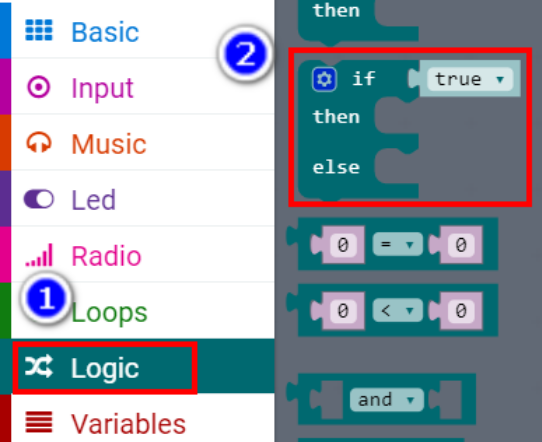
The locations of blocks in the total program are shown in the following figure.
7-1-8

7-1-9
7-1-10
7-1-11
4.Download programming
You need to make sure that the micro:bit development board is connected to the computer. Then you should click on the download in the lower left corner as shown in P 7-1-11 to download the program to micro:bit.
7-1-12
5.Phenomenon
After the code is uploaded.
When the tracking probe of HellBot on the white material, you can see that the indicator light on the module is off, and the colorful lights is red.
When the tracking probe of HelloBot on the black material, you see that the indicator light on the module is on, and the colorful lights is green.
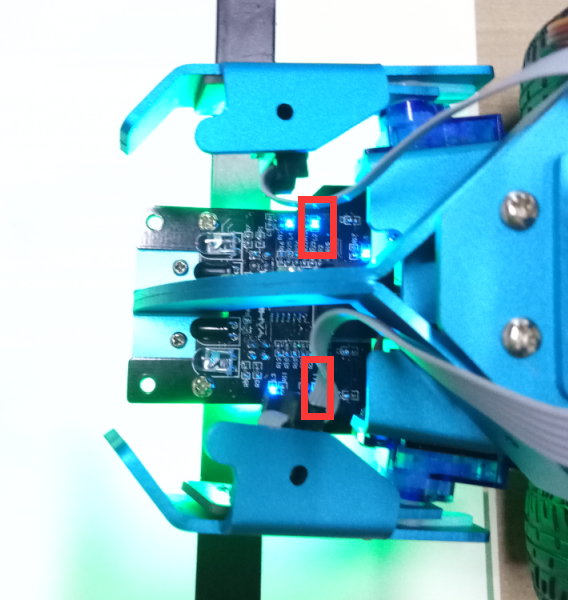
When the left tracking probe of HelloBot on the black material, you see that the left indicator light on the module is on, and the colorful lights is green.
When the right tracking probe of HelloBot on the black material, you see that the right indicator light on the module is on, and the colorful lights is green.

7-1-13 The tracking probe on the white material
7-1-14 The tracking probe on the black material

7-1-15 The left tracking probe on the black material

7-1-16 The right tracking probe on the black material