Chapter16 :회피와 따라가기
1.Preparation
1.You should learn about the position of the infrared module in the body of hellobot;
2.You should learn about the principle of the infrared obstacle avoidance.

9-2-1 position of infrared module

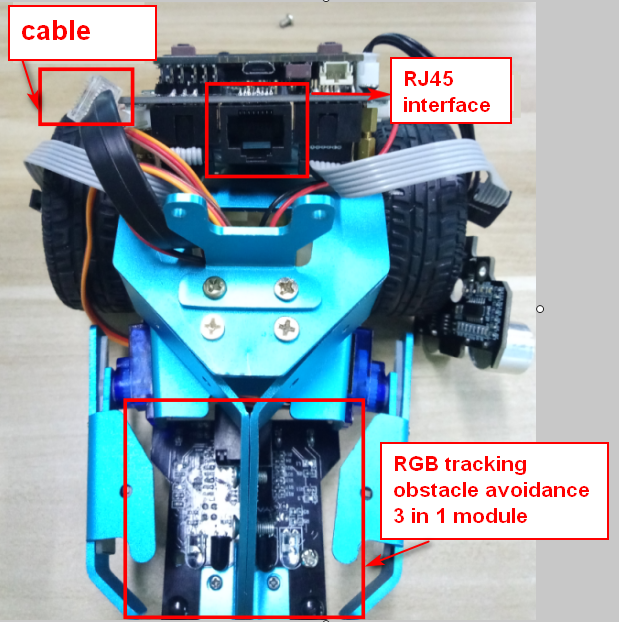
9-2-2 RJ45 interface of RGB tracking obstacle avoidance 3 in 1 module
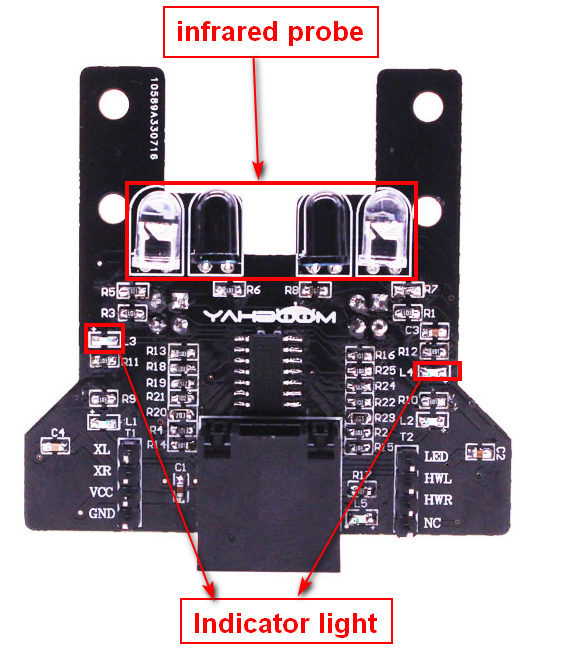
- infrared obstacle avoidance probe
9-2-2 RGB tracking obstacle avoidance 3 in 1 module
When there is an obstacle in front, indicator light is on, when there is not an obstacle in front, indicator light is off.
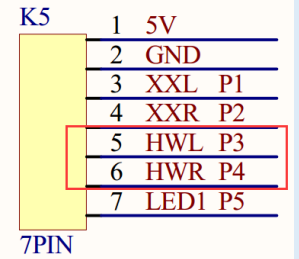
9-2-3 about wiring
The RGB tracking obstacle avoidance 3 in 1 module is installed under the robot arm of the HelloBot, and we need to use the network cable to connect the RGB tracking obstacle avoidance 3 in 1 module.
9-2-4 schematic
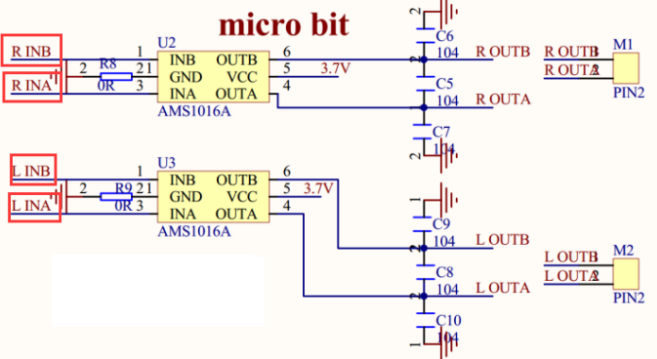
9-2-5 schematic of motor drive
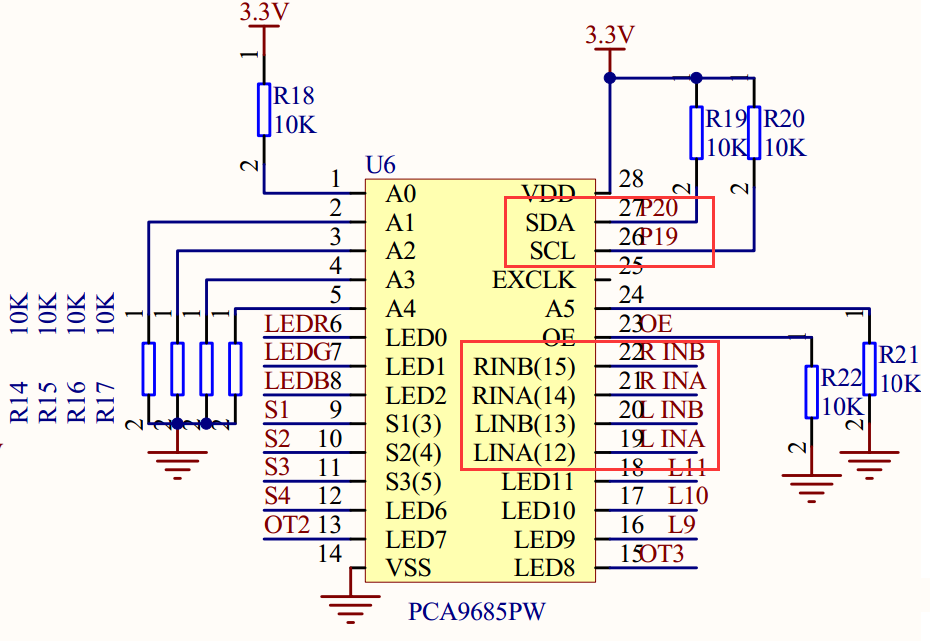
9-2-6 schematic of PCA9685PW

9-2-7 Pins of Micro:bit
From the schematic diagram. You can see that Pin _Trig of ultrasonic module(SCL) is connected to P3 of Micro:bit, Pin_Echo of ultrasonic module(SDA) connected to P4 of Micro:bit.
PCA9685PW connects micro:bit P19 and P20 pins for I2C communication.
Principle of infrared obstacle avoidance:
The basic principle of the infrared sensor to avoid obstacles is to use the reflective nature of the object. Within a certain range, if there is an obstacle, the infrared rays will encounter obstacle and will be reflected to reach the sensor receiving pin.
Note:The infrared obstacle avoidance sensor is not working properly due to the interference of outdoor light. This course needs to be carried out indoors and the curtains are covered to block the outdoor light.
2.Learning goals
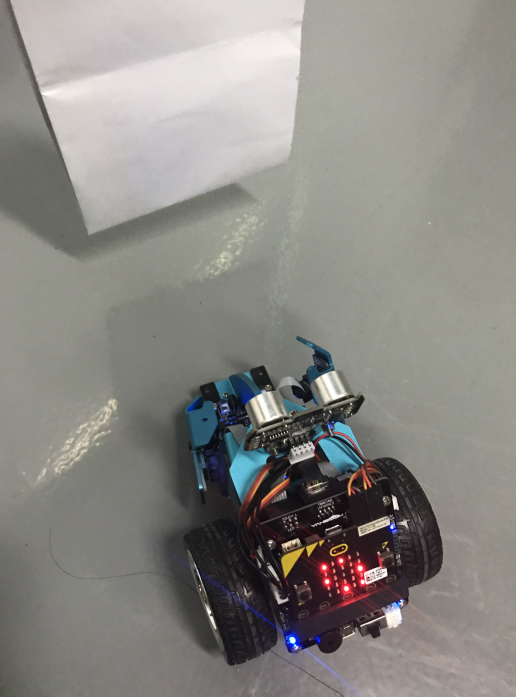
You need to put the HelloBot robot in a spacious field, use the paper or hand to block the infrared sensor in front, the indicator light is off, and the robot follows the object in front. When only the object is detected on the left side, the left indicator light is off, and the robot turn left in place to follow the obstacle. When only the object is detected on the right side, the light on the right side is off, and the turn right in place to follow the obstacle. When there is no object in front, the indicator light is on and the car stop.
3.Programming
3.1 Programming online
1) You should use the USB cable to connect the micro:bit to the computer, at this point, the computer will have a micro:bit U disk. You need to open it, click micro:bit website, then entered the micro:bit website or you can enter the URL directly in your browser: http://microbit.org/
2) After entering the programming interface, you need to click Add package and copy the HelloBot package URL: https://github.com/lzty634158/HelloBot to the input field, click to confirm the add package. Then you can use the blocks of the HelloBot package.
3.2 Programming offline
- You can double-click to use it. As shown in the following figure.
2) After entering the programming interface, you need to click Add package and copy the HelloBot package URL: https://github.com/lzty634158/HelloBot to the input field, click to confirm the add package. Then you can use the blocks of the HelloBot package.
Note: The package only needs to be added once. If you have added packages in the previous lessons, this course does not need to be added repeatedly.
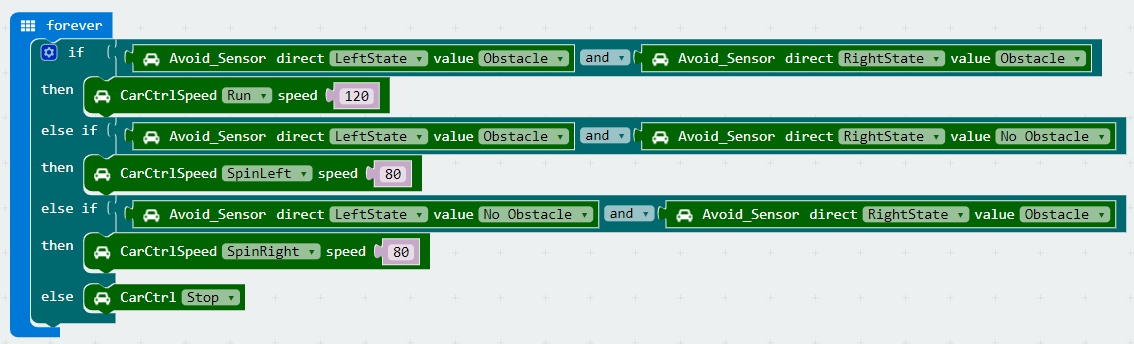
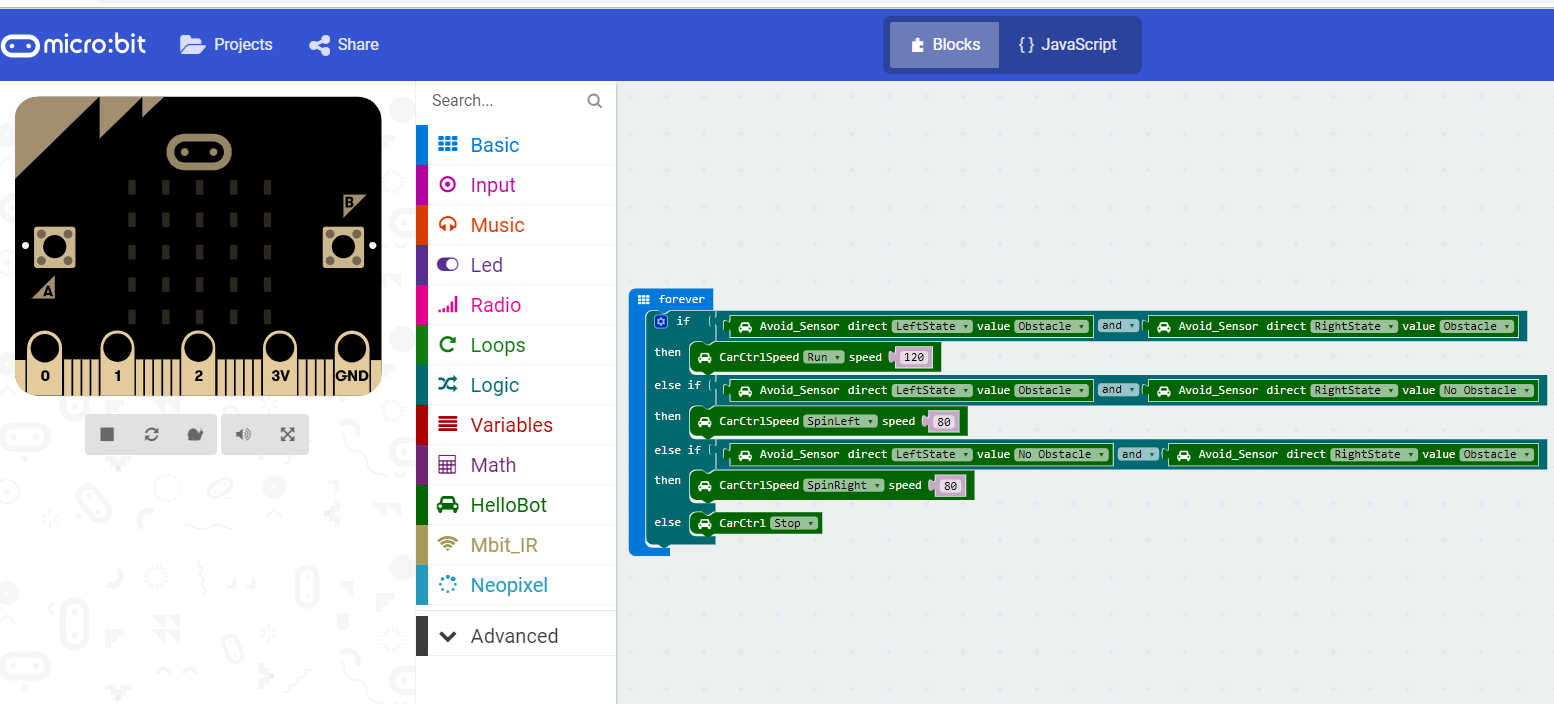
9-2-8 total program
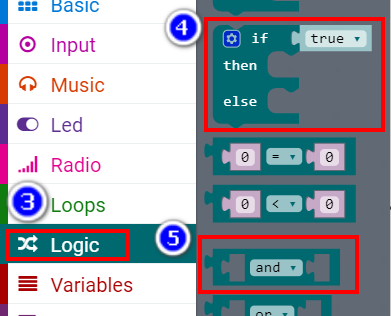
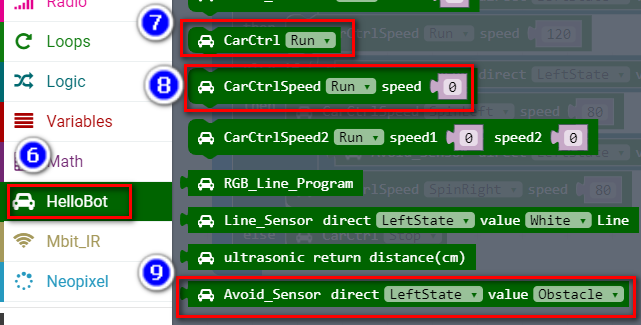
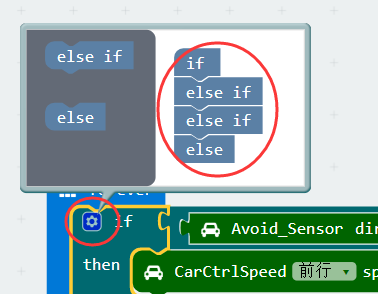
The locations of blocks in the total program are shown in the following figure.
9-2-9
9-2-10
9-2-11
9-2-12
4.Download programming
You need to make sure that the micro:bit development board is connected to the computer. Then you should click on the download in the lower left corner as shown in P 9-2-13 to download the program to micro:bit.
9-2-13
5.Phenomenon
You need to put the HelloBot robot in a spacious field, use the paper or hand to block the infrared sensor in front, the indicator light is off, and the robot follows the object in front. When only the object is detected on the left side, the left indicator light is off, and the robot turn left in place to follow the obstacle. When only the object is detected on the right side, the light on the right side is off, and the turn right in place to follow the obstacle. When there is no object in front, the indicator light is on and the car stop.
9-2-14